• Auburn
  • Black
  • Blonde
  • Blue
  • Brown
  • Gray
  • Pink
  • Red
  • White
  • Burgundy
  • Light Brown
  • Dark Red

Hair Color Code

HairColorCode.com is the number one resource for free hair color information from professionals and fans. Check out our hair color guides, ideas and advice.

Choosing the right hair color which matches your skin tone can be tough. We offer the right advice & support in maximising how you feel and expressing your personality.
  • Home
  • Hair Color Ideas
    • Dark Skin
    • Dark Hair Ideas
  • Hair Color Chart
  • Hair Color Guides
  • Celebrity Hair Colors
  • Editors Blog

Matching Hair Color To Skin Tone

March 11, 2012 By Anthony Anders 20 Comments

Beautiful woman with fair skin tone

Before I start with any sort of professional perspective, I will say this: when it comes to artistic expression there are no rules. I find that matching your skin tone and hair color can take on an intuitive guidance solely because it feels right.

Of course there are things to consider, but don’t dismiss your own gut instinct (as well as the opinion of your closest girlfriends!) Hair color sometimes works simply because it works.

Selecting a hair color that will match your skin tone

Quick Selection Guide
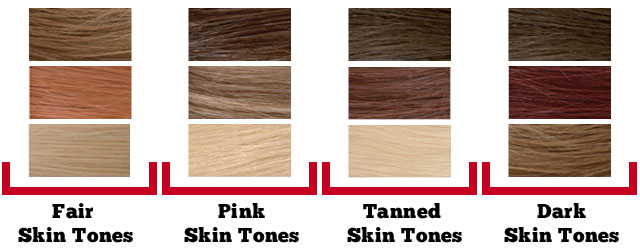
A chart showing which hair colors work for which skin tone

Fair Complexion

Woman with pale skin, red lipstick and blonde hair

There are many shades that look great if you have a fair complexion. Dark espresso browns with a cooler base can really flatter, as well as your warm reds. Fair skin will also look great with medium cool blondes and Nordic or champagne highlights. This complexion really does have a wide range of possibilities.

The main difficulties with pale skin occur when you stray too far into the extremes. If your hair is too dark or black, you may look gothic and menacing without the proper complement of make-up and fashion (unless, that’s the look you are going for!) If your hair is too light or platinum blonde, you can have a tendency to look washed-out (again, it can be ‘make-up to the rescue’ in this scenario).

Pink Complexion

Woman with pink skin tone and brown hair

Those with red or pink tones in their skin may want to stay away from the cooler red shades, as they can leave you looking flushed (and in extreme cases you can even end up looking like a human raspberry!).

This skin tone can benefit by sticking in the neutral ranges, but if you are feeling more daring go for a slightly brighter blonde and add a few highlights.

Tanned Complexion
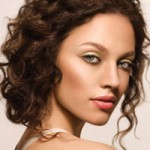
Woman with tanned skin and curly brown hair

Although tanned skin can look great; if you have yellow or gold tones in your skin you may want to avoid colors that have strong gold bases. These colors pull out the gold tones in your skin, which isn’t always flattering. Either add a touch of a copper to offset and complement your skin tone, or stick to a neutral shade.

Those with a more olive complexion can pull off the cooler reds and burgundies, and also seem to be flattered by darker shades and highlights of a “coffee-with-cream” or subtle caramel tone.

Dark Complexion
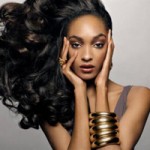
Woman with dark afro hair and dark skin

Those with dark complexions often have a hair fabric that has a tenacious adversary when it comes to lightening. It’s difficult to get through the brassy gold stages into the blonde shades without compromising the hairs integrity.

Lighter latte shades (that still have some depth) can flatter and colors with a flaxen golden hue bring out warmth in the skin. Reds in the darker levels can also add a richness to the skin, but trying to get the lighter reds require more chemicals and processes which will increase the fadage that reds have a tendency to bring.

Using make-up to match your skin tone to your new hair color
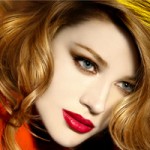
Woman with red hair with pale make up and red lipstick

The one aid that the ladies have that may not work for the men is that once a new color is selected, a new palette of make-up can compensate for the tonal differences in the skin.

With any deviation from your natural color, or from a color you have worn for some time, you may want to make sure that you go straight from the salon to the make-up counter to address this issue. Remember that it’s not just the alluring eye shades that may need to be upgraded, but also your foundation! Gentlemen – you can grab a tube of self-tanner and hide it behind your mouthwash. No one will be the wiser.

Other things to consider…

As with any hair color change, doing your homework is essential for a striking outcome. Take the time to clip and save pictures of colors that you have in your sights. Ask your friends and loved ones as well as asking a professional and take all this information into consideration.

Also remember that makeup can give you the skin tone that nature didn’t. So hold back a few extra dollars for some new cosmetics after your color excursion. It is also a great excuse to go shopping for new clothes as well!
Filed Under: Hair Color Guides

Hair Color Shades – A Selection Guide

February 9, 2012 By Anthony Anders 59 Comments

Woman with brown and red hair color shades

Congratulations, you have made the big decision to change your hair color – that’s the hard work done, right?

Wrong. Now the job of selecting a shade begins. And let’s face it, if it was as simple as choosing between blonde, brunette, black and red, there wouldn’t be a need for HairColorCode.com!

When it comes to shades there are literally hundreds if not thousands of possibilities so it is wise to start by narrowing down your options.

Get started by finding your level

A hair color level chart ranging from 1 to 10

To kick things off, let’s start by selecting your level. This is how light or dark you want to go, and obviously a strong determination of whether you become a brunette or a blonde. Level 1 is the darkest and Level 10 is the lightest (however some cosmetic brands go up to Level 12).

As a general guide, Level 1 is black (reserved for the Goth kids) and Level 2 is typically the color found is most Asian/Indonesian hair. Levels 8 through 10 are the very lightest blonde (but remember to allow room for margin as every brand is slightly different). We are not concerned with tonality or shade here, just the lightness or darkness of your color.

Next step, pick your perfect tone

Ok, so you have chosen your level, the next step is to select your tone. This is how you tailor your color to your complexion and your wardrobe.

When it comes to tones you will have three options, cool, neutral or warm. Let’s say for example you have selected Level 4. You now have the choice of Level 4 cool, Level 4 neutral or Level 4 warm. Each of these categories will contain two or three specific shades so you can find the one that is exactly right for you.

The three options when it comes to tone:

A chart of the cool neutral and warm hair color tones

Cool tones have undertones of blues and greens, and are sometimes referred to as ash tones. They can be harder to see in darker levels, but at lighter levels they produce a champagne or icy blonde.
Neutral tones are a balance of warm and cool and do not fall heavily at either side of the line.
Warm tones have reds, oranges and golds as the dominant colors, represented in shades such as chestnut brown at a lower levels and strawberry blonde at the higher levels.

So how do you decide if you are cool, neutral or warm?

One of the best indicators of your perfect tone is your skin complexion and eye color

Check out this article on selecting a color for your skin tone.

An understanding of tones is invaluable when it comes to color correction, for example if your neutral shade becomes ‘brassy’ you can select a shade with cool tones at the same level to balance it out.

There are some tonal selections which might initially seem confusing, for example ‘cool reds’ such as burgundy and merlot shades, these are called secondary pigments and are another means of subtly changing your color.

And Now it’s time to pick your next hair color shade!

Once you have decided on a level, and either a cool, neutral or warm tone, you will have narrowed down your options to two or three shades. Which one you go for is entirely up to you, but hopefully if you have followed these steps the choice should be a little less daunting!

If you’re ready to pick your new shade, check out our Hair Color Chart

Color does not have to be tricky, but a little research will help you to make the best choices. Whether you are coloring your hair at home, or starting negotiations with a professional, an understanding of levels, tones and shades will help you predict the end result prior to placing the product on your precious locks.

Filed Under: Hair Color Guides

Hair Highlights – The Ultimate Guide

February 6, 2012 By Anthony Anders 13 Comments

Brunette with lighter hair highlights

Whether giving Mother Nature a nudge, or taking your enhanced hair color to the next level, highlights can add interest and dimension to your style! From selecting subtle streaks or going for bold splashes, highlights allow you to personalize your color and add a touch of flair to your hair.

First Things First

Now first off I want to stress that when you start to venture into the highlighting (or low lighting) game, the skill levels needed increase dramatically! Since this is a technique of taking strategically selected pieces of hair that coincide with the chosen hair style, it is best to not do this as your first attempt at cosmetic enhancement. Although it can be done at home, skilled hands are essential. Without proper technique, bad color can happen to good people!

That being said, highlights can perform a variety of benefits. Not only do they add depth, movement, and eye-catching color complements, in some cases they can actually extend the time between retouches.

Woman with natural blonde highlights

The highlights will have a tendency to diminish the visible line between your natural hair growing in and the chosen color – unless of course you have opted for a shade at the opposite end of the color spectrum.

The highlights visually ‘break up’ the line of demarcation, and many people feel that they get a little while longer between tune-ups as the noticability of the regrowth is lessened and looks a bit more natural.

(NOTE – Most color services still require attention between the four and six week mark!)

For those with baby-fine or silky hair, highlights (whether alone or partnered with another color service) will add a bit more ‘oomph’ to the hair fabric. Many feel that the extra volume they are able to achieve is well worth the highlights regardless of the cosmetic noticability. Also by adding two or more colors in your highlight palette, you can add the illusion of having more hair as the density issue is overshadowed by the interest created by the infusion of new colors.

Your options in highlights vary, so here are some of your choices if you decide to take this route:

Frosting Caps

Woman having highlights through a frosting cap

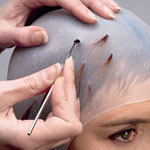
Many have heard of the ‘frosting’ caps of days of old. In small cases (very small), these can still work. But take note, you are best to have short layered hair – the thicker the better; if not, you better have a tough scalp and pain tolerance (the hair is yanked through a small rubber hole in a cap with a crochet hook), and you are best to not really care much about the outcome aside from the fact your hair is going to be lighter. So, in short– ‘caveat emptor’ (let the buyer beware!)

Foil Highlights

Woman with foil highlights

Among the most beautiful highlights are the strands you receive from the skilled hands of a professional. Often foils are used to isolate the chosen strands that allow them to process without the color bleeding. This skill is one that requires training, dexterity, and an artist’s eye.

However, it goes without saying that this will cost you, and the bills can add up if you go to a premium salon. Often foil highlights can be one of the priciest of salon services (for a full head.) A quick insider tip – upon consultation, you are often able be able to get a ‘sample’ by only doing a few sunny strands along your part line or to frame your face. You can always turn up the brightness too, so when sampling, baby-steps are recommended.

Panel Highlights

Woman having thick highlights in salon

Panels, splashes, and veils (there are many names) are larger sections of color than can be few centimeters or more in width. They are for a more dramatic effect and are often used to make a dramatic color statement.

These are harder to retouch, so I also recommend consulting a professional on this method. Since this technique also looks good by using a few different colors that complement one another, this may also cost you more than single process applications.

Balayage Highlights

Salon colorist giving balayage highlights

Balayage (derived from the French word meaning ‘to sweep’) is a beautiful, natural method of hand-painting randomly selected strands of hair to mimic the sun shining on the hair.

The impressionist style of painting is harmoniously placed to bring out the most of the style. The color is painted in soft, sweeping strokes, and the regrowth is almost undetectable as the color seems to just ‘appear’. Since this often uses a very strong chemical product it is my recommendation you do not try this at home! Even professionals must have a skilled touch and keen eye (and a paid insurance policy) to pull this off!

Go forth and highlight!

Although costly at times in a salon (do your research), it is my professional opinion to keep highlights out of your kitchen (without practice – a lot of practice) as it can cost you a car payment to get fixed if done incorrectly.

Choose what you would like to see in your style and then match the method accordingly. Browse through many hair color photos and see what catches your eye. It is best to fit the technique to the desired end result. Highlighting and low lighting (same technique, just adding darker pieces) are a great way to tweak and personalize your hair color statement.

Whether alone or in tandem with another service – highlights will bring out the best in your hair color!

Filed Under: Hair Color Guides

The Essential Home Hair Color Kit

January 19, 2012 By Shona Short Leave a Comment

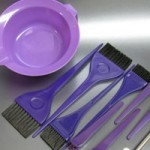
basic kit for hair coloring

The great thing about home hair color kits is that they contain everything you need to dye your ‘do within one neat little box.

However to maintain the effect you can expect to touch up your roots at least once every 8 to 12 weeks, and there are some cheap and easily available items that can make that process so much less of chore.

Ladies and gentleman, may we present our essential home color tools…

1. Plastic wrap

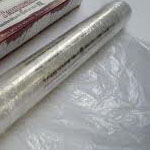
Plastic wrap to be used for hair coloring

Plastic wrap, or clingfilm, is the one essential we would never be without. Use it to wrap your hair once you have applied the dye and you can get on with life while the product does its job, without splattering a CSI worthy trail of fluid across walls and furniture.

Another great tip is to wrap your basin (and any other vulnerable surface) in film BEFORE you start mixing or applying the hair dye – once you are done you simply remove the film and with it any excess product that may have gone astray. Voila, a clean bathroom with no scrubbing!

2. Hairdressing Clips

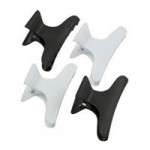
Set of four hairdressing clips

You can pick these up from most drug stores – in fact the cheap plastic clips are perfect for dying hair as the plastic won’t be corroded by the chemicals in the product.

Hairdressing clips are invaluable for those of us with longer locks, use them to divide your hair into sections and you’ll find it so much easier to work the dye through every inch of your hair. Miss a spot and you’ll have to start the whole process again, or limit yourself to hair styles that cover the offending area!

Similarly, a basic plastic comb for working the dye right to the ends of your hair is another worthwhile investment – the product will be more effective without the hassle of getting dye out of your regular comb (just make sure you can tell the two apart).

Remember, if you clip your hair up during application you are less likely to drip product on yourself or your surfaces.

3. Gloves

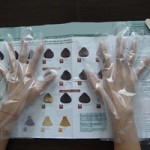
Plastic gloves for hair coloring

Ok, we know that all the major brands of home hair dye kits include plastic gloves, and the quality of these have dramatically improved over the last few years, however the fact is gloves are useful at the application AND at the removal of the dye.

Most of us prefer to have the full use of our hands for the twenty minutes in-between, and is there anything worse than putting on cold, wet, sticky gloves once the application time is up?

The obvious solution, invest in a box of latex gloves.

They have a thousand useful household applications, from balloons to homemade chicken costumes, and until HairColorCode gets our “two pairs of glove per kit” campaign off the ground, having your own supply is the best way to keep your mitts nice and cosy.

4. Petroleum Jelly

Oh petroleum jelly, is there anything you can’t do? Apply around your face, on your ears and around the nape of your neck, and even if the dye lands on your skin, it won’t stain.

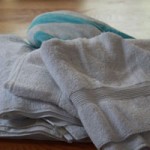
5. Old Towels/Rags

Towels for hair coloring

This may sound obvious, but if you are going to be coloring your hair on a regular basis it is well worth having a set of dedicated towels, rather than risking your best Egyptian cotton or throwing your fluffiest bath sheet to the lions.

If they get stained, no problem, if you spill a little product on the floor, use them to mop it up. No tears, no sweat.

6. Timer/alarm clock

I don’t need a timer, I’ve got one on my cellphone/designer watch, right? Sure, if you want to put expensive electrical items in the firing line of a product which is designed to stain! You can pick one of these up for a few dollars and in the long run it may save you a fortune.

So that’s it, everything you need to make dying your hair a walk in the park. If you’ve got any other great ideas to help take the effort out of home coloring, we’d love to hear from you on [email protected]. Til next time, happy hair!

Filed Under: Hair Color Guides

Kool-Aid Hair Dye – The Complete Guide

December 1, 2011 By Liz Randell 380 Comments

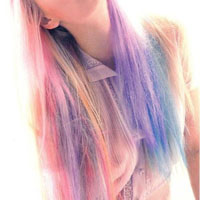
Girl with hair colored with kool-aid hair dye

As an alternative to harsh chemical hair dyes, using Kool-Aid (yes really!) to dye your hair is one of the simplest and most fun ways to change your look.

If you’re not familiar with Kool-Aid, it’s a flavored powder that you mix with water to make a fruit drink. But what does this have to do with coloring hair I hear you ask?

Well because Kool-Aid is available in a wide range of flavours and in individual packets a range of bright colors can be achieved, also Kool-Aid is a natural alternative to hair dye as it contains no harsh chemicals (obviously – because you drink it!)

The individual sachets make it easy to try different colors on your hair and you can create multi colored highlights, panels or an all over color – let your imagination go wild! Using the Kool-Aid powders will create a semi-permanent color which will stay on your hair for around eight weeks. However the overall color result will vary depending on the color of your natural hair.

Kool-Aid Color Combinations

Have fun trying out these colors and combinations:

Double Double Cherry

Bright Red
Triple Awesome Grape

Purple
Tropical Punch

Red Tint
Lime

Light Green
Blue Raspberry

Blue
Blue Raspberry + Grape

Electric Blue
Berry Blue + Lemon Lime

Turquoise
Lime + Blue Raspberry

Dark Blue

Try to avoid light colors like watermelon, lemonade and strawberry lemonade as they are unlikely to show up, and use sugar free Kool-Aid where possible to stop the hair becoming sticky.

Kool-Aid Hair Dye Tutorial

For this tutorial you will need:

– An old towel to put around your shoulders (I find a peg or clip is handy to stop it slipping)
– Petroleum Jelly
– 2 to 3 Sugar-free Kool-Aid sachets in the flavours you want
– Conditioner
– Water
– Glass mixing bowl
– Wooden spoon
– Latex Gloves (the kind you use to apply fake tan)
– Paintbrush (for application, alternatively you can use your fingers)
– Saran Wrap or foils (for highlights or panels)
– Shower cap (optional)

Step 1

Firstly decide on the color you want and then use a glass bowl to mix the Kool-Aid to get the desired end result (see the color combinations chart above). At this stage we are just mixing dry powder together to get an idea of the color.

Step 2

Once you’re happy with the color, add a little cold water to the powder to make a paste. The paste should be thick and creamy so add just a few drops at a time until you get the right consistency. If it is too thin then the color won’t take to the hair.

Step 3

Put a thin layer of petroleum jelly around your hairline and on your ears to stop the color from staining your skin and then make sure your clothes are protected. As with any hair color attempt, have towels on standby!

Step 4

Add a few drops of thick conditioner to the paste, then using the paintbrush or your fingers apply the paste to your hair and massage it in. Make sure it’s evenly distributed and that the color goes deep into the hair, which will create a level finish.

Step 5

Once applied, wrap your hair in cling wrap, or if you are creating colored sections or high-lights, wrap the hair in foil. This will help the color develop overnight. You can also wear a shower hat to sleep in to keep your foils in place.

Step 6

In the morning, rinse off the Kool-Aid and then shampoo and condition as normal. Your hair will be colored without any of the chemicals you find in regular hair dyes and you’ll have created your own individual look. Plus, your hair will smell fruity!

Remember if you have long hair that you may need to use several packets, and that if you have dark hair the shades will not show up as vividly and may just give you a tint of color. Also if you have blonde hair, please bear in mind that blue and yellow make green!

Filed Under: Hair Color Guides

  • « Previous Page
  • 1
  • 2
  • 3
  • 4
  • Next Page »

About Us

  • About Us
  • Blog
  • Contact

Come Say Hi on Facebook

Four women with hair colors

Hair Colors – Starting With The Basics.

Find What You Are Looking For

Getting Started

  • Hair Coloring Basics
  • Hair Dye Guide
  • Hair Color Shades
  • Hair Colors
  • Color Ideas For Brunettes

Hair Color Guides

  • Changing Hair Color
  • Kool Aid Hair Dye
  • Hair Color Removal
  • Natural Hair Dye
  • Henna Hair Dye
  • Red Hair Dye

About The Team

  • About Us
  • Blog
  • Contact

Copyright © 2025 · HairColorCode.com

This site uses cookies: Find out more.